Are your gas stove burners looking grimy and clogged? Cleaning them might seem like a hassle, but it’s easier than you think—and it makes a huge difference in how well your stove works.
When your burners are clean, your meals cook evenly, and your kitchen stays safer. In this guide, you’ll discover simple, step-by-step tips to get your burners sparkling again using everyday items. Keep reading, and you’ll be amazed at how quick and satisfying this small task can be!
Removing Burners Safely
Removing gas stove burners safely is key to effective cleaning. It prevents damage and ensures your safety. Handling burners carefully avoids gas leaks and accidents. Follow clear steps before detaching any parts. This helps keep your stove in good condition.
Gathering Cleaning Supplies
Prepare all cleaning tools before starting. This makes the process smooth and quick.
- Dish soap
- Warm water
- Soft sponge or cloth
- Old toothbrush
- Paper towels or clean rag
- Toothpick or needle (for tiny holes)
- Gloves (optional for hand protection)
Detaching Burners From Stove
Ensure the stove is off and cool to touch. Disconnect the gas supply if possible for added safety. Gently lift the burner caps off the stove. Remove the burner bases carefully without bending or breaking parts. Keep all pieces together to avoid losing them. Avoid using force; burners should come off easily.
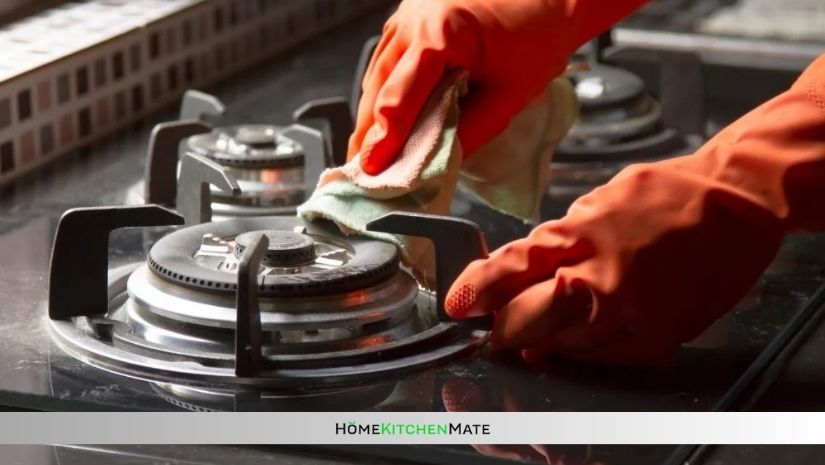
Cleaning Burners Effectively
Cleaning your gas stove burners effectively is key to keeping your kitchen safe and your cooking efficient. Burners that are clogged or greasy can cause uneven flames or even prevent your stove from lighting. Taking the time to clean them properly not only improves performance but also extends the life of your appliance.
Soaking And Scrubbing Techniques
Start by removing the burners from the stove carefully. Place them in a bowl filled with hot water and a few drops of dish soap. Let them soak for at least 20 minutes to loosen grime and grease.
After soaking, use a soft brush or an old toothbrush to scrub away the residue. Focus on stubborn spots but avoid using anything too abrasive to prevent damage. Rinse the burners well with clean water and dry them completely before putting them back.
Clearing Clogged Burner Holes
Burner holes can get clogged with food particles and grease, which disrupts the gas flow. Use a straightened paperclip or a needle to gently poke through each hole. Be careful not to enlarge or deform the holes.
If you notice heavy buildup, try using a toothpick combined with a bit of baking soda paste to dissolve the residue. After clearing the holes, blow gently to remove any loosened debris. Check the flame after reassembling—does it burn evenly now?
Reassembling And Maintaining Burners
After thoroughly cleaning your gas stove burners, putting them back together correctly is crucial for safe and efficient cooking. Proper reassembly ensures each burner functions as intended, avoiding uneven flames or gas leaks. Plus, regular upkeep helps keep your stove looking and working like new.
Drying And Reattaching Burners
Make sure every burner part is completely dry before reattaching. Even a small amount of moisture can cause ignition problems or rust over time. I once rushed this step and ended up with a burner that wouldn’t light properly for days—definitely not worth the hassle.
Start by placing the burner base back onto the stove, aligning it with the gas outlet. Then, fit the burner cap snugly on top, ensuring it sits evenly. If your stove has burner rings, set them carefully to avoid any gaps that could disrupt gas flow.
After reassembly, test each burner by turning it on low. Watch the flame closely—if it’s uneven or sputtering, adjust the parts until the flame is steady. This simple check saves you from bigger problems later.
Tips For Regular Maintenance
- Clean spills immediately:Don’t let food or grease sit on burners; wipe them off right away to prevent buildup.
- Inspect burner ports:Check the tiny holes where gas comes out. Use a soft brush or toothpick to clear any blockages gently.
- Use appropriate cleaning tools:Avoid abrasive sponges that can scratch burner surfaces. Soft cloths and mild detergents work best.
- Schedule deeper cleans:Set a reminder every few months to remove burners for a thorough wash and inspection.
- Check ignition regularly:If your stove has electric igniters, keep them clean and dry to avoid misfires.
How often do you check your burners for buildup or damage? Making a habit of simple maintenance tasks can prevent costly repairs and keep your stove performing perfectly every day.
Frequently Asked Questions
How Often Should I Clean Gas Stove Burners?
Clean burners every 1-2 weeks to keep them working well and avoid grease buildup.
What Household Items Clean Gas Stove Burners Best?
Use baking soda, vinegar, warm water, and a soft brush for safe, effective cleaning.
Can I Soak Gas Stove Burners In Water?
Yes, soak them in warm, soapy water for 15-30 minutes to loosen dirt and grease.
How Do I Remove Stubborn Stains On Burners?
Make a paste with baking soda and water, apply it, then scrub gently after 15 minutes.
Is It Safe To Clean Burners With A Needle Or Pin?
Yes, carefully use a needle to unclog burner holes without damaging the metal.
How Do I Dry Gas Stove Burners After Cleaning?
Dry burners fully with a cloth or air dry to prevent rust before reinstalling.
Conclusion
Cleaning gas stove burners keeps your kitchen safe and smelling fresh. Regular cleaning stops clogs and helps burners work well. Use simple tools like brushes and mild soap for best results. Always let parts dry fully before putting them back.
A clean burner means better cooking and less smoke. Try to clean your burners often for a smooth cooking experience. Small steps make a big difference in your kitchen’s health. Keep your stove shining and ready for every meal.

Rachel Bennett is a passionate home cook, kitchen enthusiast, and the voice behind Home Kitchen Mate. With years of hands-on experience experimenting in the kitchen, she blends creativity and practicality to make cooking easier and more enjoyable for everyone.